
GE refrigerator repair manuals are official resources offering detailed diagnostic and repair guidance. Available as PDF downloads, they cover troubleshooting, maintenance, and replacement parts, ensuring comprehensive support for all models.
1.1 Overview of GE Appliances and Their Repair Manuals
GE Appliances, a trusted name in home electronics, provides comprehensive repair manuals for their refrigerators. These manuals are designed to assist both professionals and DIY enthusiasts in troubleshooting and fixing issues. Available online as PDF downloads, they cover various models, including PFSS6NKW and GE Fluorostar 7900. The manuals detail diagnostic procedures, maintenance tips, and repair instructions, ensuring users can address common problems effectively. They often include parts lists, wiring diagrams, and step-by-step guides, making them indispensable for ensuring optimal appliance performance. By following these manuals, users can extend the lifespan of their GE refrigerators and maintain their efficiency and functionality over time.
1.2 Importance of Using Official GE Repair Manuals
Using official GE repair manuals ensures accuracy and reliability when diagnosing or fixing refrigerator issues. These manuals are specifically designed for GE models, providing detailed, model-specific instructions that minimize errors. They include diagnostic flowcharts, wiring diagrams, and parts lists, making repairs safer and more efficient. Official manuals also guarantee compliance with manufacturer standards, preserving warranty validity and preventing potential damage. By following these guides, users can address issues confidently, ensuring their GE refrigerator operates optimally. This resource is essential for both professionals and DIY enthusiasts, offering a comprehensive and trusted solution for maintaining appliance performance and longevity.
1.3 Where to Find GE Refrigerator Repair Manuals Online
Official GE refrigerator repair manuals can be easily accessed online through the GE Appliances website. Visit the Owners Support section and select Appliance Manuals to find specific guides for your model. Additionally, websites like ManualsLib and Scribd offer free downloads of GE service manuals in PDF format. Enter your refrigerator’s model number to locate the exact manual. Many manuals are available immediately, ensuring quick access to diagnostic and repair information. These resources provide detailed instructions, parts lists, and troubleshooting tips, making them indispensable for both professionals and DIY enthusiasts. Always verify the source to ensure you’re downloading authentic GE manuals.
Troubleshooting Common GE Refrigerator Issues
Identify error codes, analyze symptoms, and use diagnostic tools to resolve common GE refrigerator problems; Refer to official manuals for step-by-step solutions and repair guidance.
2.1 Identifying Error Codes on GE Refrigerators
GE refrigerators often display error codes to indicate specific issues. These codes, such as “C” or “E” followed by numbers, are crucial for diagnosing problems. Users can find these codes in the diagnostic mode or service manuals. Official GE repair manuals provide detailed interpretations of each code, guiding technicians or DIYers to the root cause. For example, a “C23” error might indicate a temperature sensor malfunction, while an “E1” could signal a communication failure. By referencing the official GE service bulletins or diagnostic flowcharts, users can accurately identify and address these issues. Always ensure to use the model-specific manual for precise information.
2.2 Common Symptoms and Their Possible Causes
GE refrigerators may exhibit symptoms like inconsistent cooling, unusual noises, or water dispenser issues. Inconsistent cooling could stem from faulty evaporator fans or clogged condenser coils. Strange noises often indicate problems with the compressor or fan motors. Water dispenser issues might be due to a malfunctioning solenoid or low water pressure. Diagnostic flowcharts in GE service manuals help link these symptoms to specific components. For example, a noisy evaporator fan motor could signal wear or ice buildup. Referencing repair manuals ensures accurate troubleshooting, guiding users to inspect and test components effectively. Addressing these issues promptly prevents further damage and maintains appliance efficiency.
2.3 Basic Diagnostic Tools and Techniques
Essential tools for diagnosing GE refrigerator issues include multimeters, thermometers, and leak detectors. A multimeter helps measure electrical circuits, while thermometers check temperature accuracy. Leak detectors identify refrigerant leaks. Diagnostic flowcharts, found in GE service manuals, guide troubleshooting by linking symptoms to components. For example, a faulty defrost heater might cause ice buildup. Techniques involve inspecting connectors, testing sensors, and monitoring system performance. Using the model number, users can access specific diagnostic instructions from GE’s official resources. These tools and methods ensure accurate issue identification, enabling effective repairs and minimizing downtime. Regular use of these techniques helps maintain appliance efficiency and longevity.
Maintenance and Routine Care for GE Refrigerators
Regular cleaning of condenser coils improves efficiency. Check and replace water filters every six months. Defrost the freezer compartment periodically to prevent ice buildup.
Align door seals properly for optimal closure. These routine tasks extend the appliance’s lifespan and maintain performance.
3.1 Cleaning the Condenser Coils
Cleaning the condenser coils is essential for maintaining your GE refrigerator’s efficiency and performance. Dirt and dust buildup can cause the compressor to overheat, leading to higher energy bills and potential repairs.
To clean the coils, unplug the refrigerator for safety. Locate the condenser coils, usually at the back or bottom. Use a vacuum cleaner or a soft-bristle brush to gently remove dust and debris.
For stubborn dirt, a garden hose with low pressure can be used, but avoid moisture exposure to electrical components. Regular cleaning ensures proper airflow, reduces energy consumption, and prolongs the appliance’s lifespan.
3.2 Checking and Replacing the Water Filter
Regularly checking and replacing the water filter is crucial for maintaining water quality and system performance in your GE refrigerator. Over time, filters become clogged with impurities, reducing water flow and filtration efficiency.
To replace the filter, locate it near the bottom or back of the refrigerator. Turn the filter counterclockwise to remove it, then discard the old one. Insert a new GE-approved filter, aligning it properly, and turn it clockwise until it clicks.
Replace the filter every 6-12 months or as indicated by the manufacturer. This ensures clean water, prevents contamination, and maintains optimal refrigerator performance.
3.3 Defrosting the Freezer Compartment
Defrosting the freezer compartment is essential for maintaining efficiency and preventing ice buildup. Start by turning off the refrigerator and emptying the freezer. Remove shelves and racks to allow thorough access. Cover the floor with towels to catch water as the ice melts. Allow the freezer to thaw completely, which may take several hours. Once defrosted, wipe down surfaces with a clean cloth to remove residue. Check for any blockages in the drain and ensure it’s clear to prevent water accumulation. Regular defrosting helps maintain optimal performance and prevents damage to internal components. Always follow safety guidelines during the process.
Repairing Specific Components
Official GE repair manuals provide detailed instructions for replacing or fixing components like compressors, evaporator fans, and defrost heaters. They include essential tools, diagrams, and safety tips.
4.1 Replacing the Compressor
Replacing the compressor in a GE refrigerator requires careful adherence to the official repair manual. Ensure the appliance is disconnected from power and the refrigerant system is safely evacuated. Use specialized tools like manifold gauges and a vacuum pump to handle refrigerant recovery. Refer to the specific model’s service manual, such as the PFSS6NKW or PFSS6PKWASS, for detailed step-by-step instructions. Install the new compressor, ensuring proper alignment and connection of refrigerant lines. Recharge the system with the correct refrigerant amount and test for leaks. Always follow safety protocols and consult a professional if unsure about any step in the process.
4.2 Fixing the Evaporator Fan Motor
Fixing the evaporator fan motor in a GE refrigerator involves diagnosing issues like unusual noise or poor airflow. First, ensure the appliance is unplugged for safety. Refer to the service manual, such as the PFSS6NKW, for specific instructions. Check for obstructions or debris blocking the fan blades. If the motor is faulty, disconnect the electrical connectors and remove the mounting screws. Replace the motor with a compatible part, ensuring proper alignment and secure reinstallation. Reconnect the electrical connections and test the fan for proper operation. Consult the manual or a technician if issues persist, as improper repairs can lead to further complications or safety hazards.
4.3 Replacing the Defrost Heater
Replacing the defrost heater in a GE refrigerator is essential when it fails, causing ice buildup and reduced efficiency. Start by disconnecting power to ensure safety. Remove the freezer panels or evaporator cover to access the heater, typically located near the evaporator coils. Disconnect the electrical connectors and remove the faulty heater. Install the new heater, ensuring secure connections and proper alignment. Reassemble the components and restore power. Test the refrigerator to confirm the defrost cycle operates correctly. Always refer to the service manual, such as the PFSS6NKW, for specific instructions. If issues persist, consult a certified technician to avoid further complications.

Electrical and Electronic Diagnostics
GE refrigerator diagnostics involve checking the Muthaboard, sensors, and thermostats. Use diagnostic flowcharts and multimeters to identify faulty components. Ensure proper electrical connections and test circuits for accuracy.
5.1 Understanding the Muthaboard and Its Functions
The Muthaboard is a central control module managing GE refrigerator operations. It regulates temperature, defrost cycles, and compressor functions. Faulty sensors or connections can disrupt its operation. Technicians use diagnostic flowcharts to trace issues, ensuring accurate repairs. Proper handling and testing of the Muthaboard are essential for maintaining appliance efficiency and functionality. Understanding its role is crucial for effective troubleshooting and preventing costly damage to the unit.
5.2 Checking for Faulty Sensors and Thermostats
Sensors and thermostats play a critical role in GE refrigerators by monitoring temperature and ensuring proper operation. Faulty sensors can lead to inaccurate readings, affecting cooling performance. Technicians use multimeters to check electrical continuity and resistance in temperature sensors like thermistors. Thermostats are tested for proper switching at specified temperatures. Defrost sensors are also verified for correct operation during the defrost cycle. If a sensor or thermostat fails, it must be replaced to restore functionality. Diagnostic flowcharts in repair manuals help identify sensor-related issues, guiding technicians to the root cause efficiently.
5.3 Using Diagnostic Flowcharts for GE Refrigerators
Diagnostic flowcharts are essential tools for troubleshooting GE refrigerators, providing step-by-step guidance to identify and resolve issues. These charts outline specific error codes, symptoms, and potential causes, streamlining the repair process. By following the flowchart, technicians can systematically test components like sensors, thermostats, and the Muthaboard. Flowcharts often include visual representations of electrical circuits and diagnostic procedures, making complex systems easier to understand. Many GE service manuals include these charts, which are particularly useful for addressing issues like temperature fluctuations or ice maker malfunctions. Regularly updated flowcharts ensure technicians stay current with the latest repair strategies and component interactions.
Safety Precautions and Best Practices
Always wear safety gear, disconnect power, and handle refrigerants safely. Follow manual guidelines to avoid hazards and ensure proper repair techniques are applied consistently.
6.1 Proper Safety Gear for Refrigerator Repair
Wearing proper safety gear is essential when repairing your GE refrigerator. Safety glasses protect your eyes from debris, while gloves prevent cuts and ensure a firm grip on tools. A face mask is recommended when handling refrigerants or dusty components. Steel-toe boots safeguard your feet from heavy objects, and insulated tools reduce the risk of electrical shocks. Always ensure your workspace is well-ventilated, especially when working with refrigerants. Adhering to these safety guidelines helps prevent accidents and ensures a safe repair process. Remember, safety should never be compromised when working with electrical or mechanical systems.
6.2 Disconnecting Power Before Starting Repairs
Disconnecting power is a critical first step in any GE refrigerator repair. Always unplug the appliance from the electrical outlet to avoid risks of electrical shock or damage to components. Verify that the refrigerator is completely powered down before beginning work. For added safety, use a voltage tester to ensure no live wires are present. This precaution protects both the technician and the appliance. Never attempt repairs while the unit is operational, as this can lead to serious injury or further damage. Always follow this step diligently to ensure a safe and effective repair process.
6.3 Handling Refrigerants Safely
Handling refrigerants requires strict adherence to safety protocols. Always wear protective gear, including gloves and safety goggles, when working with refrigerants. Ensure proper ventilation in the workspace to prevent inhalation of harmful fumes. Use approved recovery equipment to capture refrigerants during servicing, as releasing them into the atmosphere is environmentally harmful and illegal in many regions. Follow EPA guidelines and manufacturer instructions for safe handling and disposal; Never overcharge the system, as this can cause operational issues or safety hazards. Proper refrigerant management is essential for both the appliance’s performance and environmental protection.
Accessing GE Service Manuals and Guides
Visit the GE Appliances official website and navigate to the “Owners Support” section. Select “Appliance Manuals” to access PDF downloads for specific models, ensuring accurate repair guidance.
7.1 Navigating the GE Appliances Official Website
To access GE service manuals, visit the official GE Appliances website. Click on “Owners Support” at the top of the page. From there, select “Appliance Manuals” to find repair guides. Enter your refrigerator’s model number for specific instructions. The website is user-friendly, with categorized sections for easy navigation. You can download PDF versions of service manuals instantly, ensuring you have all the necessary information for repairs. This direct access simplifies the process of locating and using official GE repair resources, providing a reliable source for troubleshooting and maintenance tasks.
7.2 Downloading PDF Versions of Service Manuals
Downloading PDF versions of GE refrigerator service manuals is straightforward. Visit the GE Appliances official website and navigate to the “Owners Support” section. Select “Appliance Manuals” to access repair guides. Enter your refrigerator’s model number to find specific manuals; Most service manuals are available as downloadable PDFs, ensuring quick access to diagnostic and repair information. Once downloaded, you can save or print the manual for easy reference. This convenient process provides reliable resources for troubleshooting and maintenance, helping you address issues efficiently.
7.3 Using the Model Number for Specific Instructions
Using the model number is essential for accessing precise repair instructions for your GE refrigerator. Locate the model number on the appliance or in its documentation. Visit the GE Appliances website, navigate to the “Owners Support” section, and enter the model number in the provided field. This ensures you access the correct service manual for your specific refrigerator model. The manual will include detailed diagrams, parts lists, and step-by-step repair procedures tailored to your appliance. This approach guarantees accuracy and relevance, making repairs safer and more efficient. Always verify the model number before downloading to avoid incorrect information.
Replacement Parts and Tools
Identifying compatible replacement parts and essential tools is crucial for effective GE refrigerator repairs. Use diagnostic tools like multimeters and leak detectors to ensure accurate and safe fixes.
8.1 Identifying Compatible Replacement Parts
Identifying compatible replacement parts for GE refrigerators is essential for ensuring safety and optimal performance. Always refer to the official GE service manuals or the GE Appliances website for model-specific part numbers. Use the model number located on the appliance to find exact matches. Common parts include compressors, evaporator fans, and defrost heaters. Generic or universal parts may not fit properly, so verify compatibility before purchasing. Order directly from GE or authorized dealers to guarantee authenticity and warranty compliance. Cross-check part numbers with the repair manual to avoid mismatches and ensure proper installation. This step is critical for maintaining appliance efficiency and longevity.
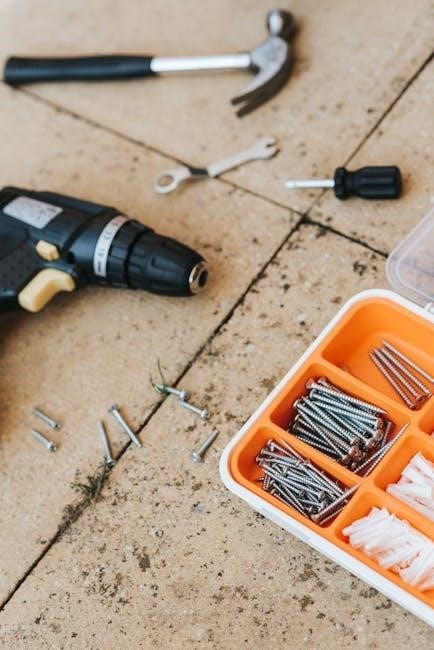
8.2 Essential Tools for GE Refrigerator Repair
Essential tools for GE refrigerator repair include a multimeter for diagnosing electrical issues, screwdrivers for disassembling components, and wrenches for handling refrigerant lines. A vacuum pump is crucial for evacuating the refrigerant system before recharging. Safety gear like gloves and goggles protects during repairs. Torx drivers may be needed for specific models. Pliers and wire cutters are handy for manipulating wires or hoses. A leak detector ensures the system is sealed properly after repairs. Always use tools compatible with the appliance’s materials to avoid damage. Refer to the repair manual for model-specific tool recommendations. Proper tools ensure efficient and safe repairs, preventing further damage.
8.3 Ordering Parts Directly from GE or Authorized Dealers
Ordering parts directly from GE or authorized dealers ensures authenticity and compatibility with your refrigerator model. Visit the GE Appliances website, navigate to the Owners Support section, and enter your appliance’s model number. This provides a detailed parts list with exact compatibility. Secure payment options and fast shipping are typically available. For convenience, many parts are available as immediate PDF downloads or physical shipments. Authorized dealers can also assist with part identification and ordering. Always verify the warranty and return policies before purchasing. Genuine GE parts guarantee optimal performance and safety, ensuring your repairs are reliable and long-lasting;

Advanced Repair Techniques
Advanced repair techniques for GE refrigerators include brazing refrigerant lines, system recharging, and diagnostic flowcharts. These methods ensure compatibility, safety, and optimal appliance performance, adhering to manufacturer guidelines.
9.1 Welding and Brazing Techniques for Refrigerant Lines
Welding and brazing techniques are critical for repairing refrigerant lines in GE refrigerators. These methods ensure proper sealing and durability, preventing leaks that can compromise cooling efficiency. Brazing, in particular, is favored for its strength and compatibility with refrigerant materials. GE repair manuals emphasize the importance of using high-quality filler metals and precise temperature control to avoid damage. Proper safety gear and ventilation are essential due to the risks of fumes and sparks. Following manufacturer guidelines ensures safe and effective repairs, maintaining the integrity of the refrigeration system. These techniques require skill and practice to master, making them advanced procedures for experienced technicians.
9.2 Recharging the Refrigerant System
Recharging the refrigerant system in a GE refrigerator is essential for restoring cooling efficiency. Begin by identifying and repairing any leaks using a refrigerant leak detector or soap solution. Ensure you purchase the correct refrigerant type, typically R-134a for most models, as specified in the user manual or appliance label. Use a refrigerant charging kit, which includes a manifold gauge set, to control the refrigerant flow. Attach the hoses to the low-pressure port, ensuring the fridge is turned off and the area is well-ventilated. Slowly add refrigerant while monitoring the pressure gauge, referring to the repair manual for the correct amount. After recharging, operate the fridge to check cooling performance. If unsure, consider consulting a professional to avoid risks associated with handling refrigerants and system complexity.
9.3 Aligning and Adjusting Door Seals
Aligning and adjusting door seals on GE refrigerators is crucial for maintaining proper sealing and energy efficiency. Inspect the seals for wear, tears, or misalignment. Clean the seals and door frames with mild soap to ensure proper adhesion. Use a torque wrench to tighten loose door hinges, as this can improve alignment. For misaligned doors, adjust the leveling feet to ensure the refrigerator is evenly balanced. Refer to the repair manual for specific torque specifications and adjustment procedures. If the seal is damaged, replace it with a compatible part from GE or an authorized dealer. Proper alignment prevents air leaks, maintains optimal cooling, and reduces energy consumption.

When to Call a Professional
Call a professional for complex issues like electrical faults or refrigerant leaks. If DIY repairs risk safety or void warranties, seek certified GE technicians for assistance.
10.1 Recognizing Complex Issues Beyond DIY Repair
Some issues, like error codes linked to the Muthaboard or refrigerant leaks, require professional expertise. If diagnostic modes or sensor malfunctions are unclear, DIY repairs may risk further damage. Complex problems, such as compressor failure or electronic control malfunctions, often need specialized tools and training. If safety is at risk, like with gas leaks or electrical faults, professional intervention is essential. Recognizing these scenarios ensures repairs are done safely and effectively, preventing voided warranties or hazards. Always consult the repair manual for guidance on when professional service is recommended to avoid complications;
10.2 Finding Certified GE Appliance Technicians
To ensure reliable repairs, locate certified GE appliance technicians through the official GE Appliances website. Visit the “Owners Support” section and navigate to “Service & Support” for a directory of authorized service providers. Additionally, GE service manuals often include contact information for certified professionals. Verify technicians’ certifications and check online reviews to confirm their expertise. Contacting GE directly through their customer service can also provide recommendations for trusted technicians in your area. Always ensure technicians are factory-trained to handle specific models and issues effectively, guaranteeing high-quality service and adherence to manufacturer standards.
10.3 Understanding Warranty and Service Agreements
GE refrigerator warranties vary by model and typically cover parts and labor for specific durations. Service agreements extend beyond standard warranties, offering additional coverage for maintenance and repairs. Review your appliance’s warranty terms to understand what is included and for how long. For detailed information, visit the GE Appliances website or consult your repair manual. Service agreements can be purchased separately to ensure continued protection. Always verify the terms and conditions to avoid unexpected repair costs. Understanding your warranty and service agreements ensures compliance with manufacturer recommendations and prolongs your refrigerator’s lifespan.
This guide summarizes key repair and maintenance practices for GE refrigerators. Regular upkeep and adherence to official manuals ensure longevity and optimal performance. Stay updated with new resources.
11.1 Summary of Key Repair and Maintenance Practices
Regular maintenance is crucial for extending the life of your GE refrigerator. Always refer to official repair manuals for model-specific instructions. Key practices include cleaning condenser coils, replacing water filters, and defrosting the freezer. Diagnosing issues early can prevent major repairs. Use diagnostic flowcharts and error codes to identify problems. Replace faulty sensors or thermistors promptly to avoid system failures. Ensure proper alignment of door seals for efficient operation. When handling refrigerants, follow safety guidelines to prevent environmental harm. Keep essential tools and replacement parts on hand for quick fixes. By adhering to these practices, you can maintain optimal performance and reduce the need for costly professional interventions.
11.2 Encouraging Regular Maintenance for Longevity
Regular maintenance is essential for ensuring your GE refrigerator operates efficiently and lasts longer. Start by cleaning condenser coils every 6 months to improve airflow and reduce energy consumption. Replace the water filter every 6-12 months to maintain water quality and prevent system damage. Check and align door seals to ensure proper cooling and minimize energy waste. Schedule annual professional inspections for critical components like compressors and evaporators. Refer to your repair manual for model-specific maintenance schedules. By staying proactive, you can prevent unexpected breakdowns, reduce repair costs, and extend the lifespan of your appliance, ensuring optimal performance for years to come.
11.3 Staying Updated with New GE Repair Manual Releases
Staying updated with the latest GE repair manual releases ensures access to the most accurate and comprehensive diagnostic and repair information. Regularly visit the official GE Appliances website or authorized service portals to check for new manual releases. These updates often include improved troubleshooting guides, new repair techniques, and compatibility with the latest appliance models. By downloading the latest PDF versions, you can benefit from enhanced instructions, parts lists, and safety guidelines. This proactive approach helps ensure your repairs are efficient, safe, and compliant with current standards, keeping your GE refrigerator in optimal condition for years to come.